Country wines are wines that are fermented from the juices of fruits, vegetables or flowers.
The best times to make country wines are Late Summer and Autumn are because the fruits are cheaper to purchase, more plentiful, ripe and full of sugar.
1. First find a recipe, there are lots to be found on the internet- this is the one I used:
Elderberry Wine Recipe |
4lb Elderberries |
1 gallon (5 litres) of boiling water |
2.2 lb (1Kg) of granulated sugar |
a 'claret' yeast sachet |
0.5 litre Red Grape Juice |
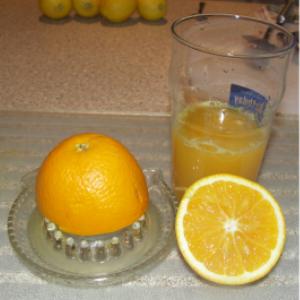
Juice of 1 lemon |
Juice of 1 orange |
1 teaspoon of yeast nutrient |
|
Notes:
- The quantities listed in this recipe are to make 1 gallon of wine. I wanted to make 4 gallons so I multiplied everything by 4.
- The original recipe listed raisins in it. Most recipes use raisins to add some of the grape nutrients, tannins etc that are not present in country fruit, to give the finished wine a more authentic flavour. I prefer to use grape juice concentrate at the level of 0.5 litre per gallon of wine.
|
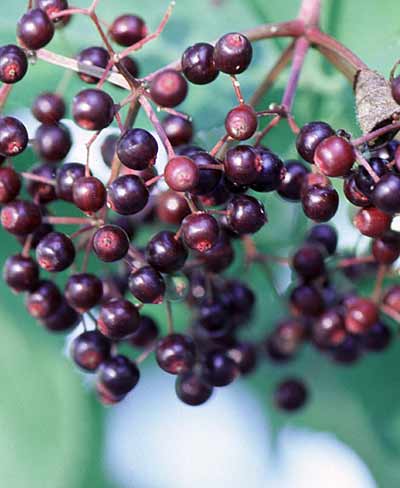
2. I found a few elderbery bushes growing along a disused railway track in the countryside near to where I live. I picked a couple of carrier bags full of elderberries trying to pick the clusters that looked most ripe and full of juice. |
 |
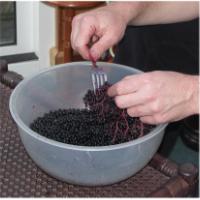
3. I washed the sprays of berries thoroughly, then stripped the berries from their stalks using a fork. |
 |
|
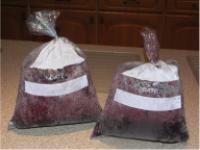
4. I put the berries in the freezer for a few days as I didn't have time to use them straight away. I think this also helps when extracting the juice as the freezing and thawing process helps break down the fruit.
I removed the bags of berries from the freezer 24 hours before I was ready to use them and placed them in my brewing bucket to defrost.
If you're not freezing your fruit, put it into your brewing bucket (after step 5 - sterilization). |
 |
5. This is the most important step in the whole process!
I cleaned and sterilised all of my equipment, and my hands, thoroughly. Your equipment must not only be visually clean but also chemically clean to prevent airborne yeasts and bacteria from spoiling your wine.
I disolved 2 Campden Tablets and a saltspoon of Citric Acid in one pint of water. The solution can be kept in a tightly sealed bottle and it can be used many times. A small quantity can be used to sterilise many jars by rinsing it around one jar and then pouring it into another – all parts must be moistened by the solution.
|
|
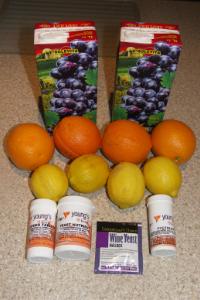
6. I gathered together all my ingredients:
At the rear are two 1 litre boxes of Red Grape Juice concentrate which are readily (and cheaply!) available at Lidl.
In the middle are my oranges and lemons.
At the front, from left to right, are:
- A tub of Campden Tablets
- A tub of Yeast Nutrient
- A sachet of Red Wine Yeast
- A tub of Pectic Enzyme
|
 |
|
7. I boiled up 8 litres of water and poured it over the elderberries in the brewing bucket and allowed it to cool to room temperature (about 6 hours).
Notes:
- Some recipes will suggest you put the fruit in a saucepan of water and boil it. It is generally thought that this will give your wine a 'cooked' taste. Pouring the boiling water over the fruit and allowing it to 'stew' gives it a more natural, more agreeable taste.
- If I'm making 4 gallons (18 litres) of wine then you may be wondering why only use 8 litres of water? The answer is that there are other things that add to the volume - 2 litres of grape concentrate, 12lb of sugar, the juice from 16lb of elderberries etc. Any shortfall in volume can be topped up with water when the juice is transfered to the demijohns.
|
 |
|
8. While the bucket was cooling to room temperature I made a starter jar for the yeast. The purpose of this step is to get the yeast to start fermenting in a small jar with a low sugar content before adding it to your main juice mixture.
I sterilised a glass tumbler (see section 5 above) then added a teaspoon of sugar, and poured on boiling water. I stirred the sugar until it had disolved and then allowed it to cool to room temperature.
I then added a pinch of yeast nutrient and poured in the contents of the yeast sachet. I covered the top of the tumber with cling film. After a few minutes the yeast started fermenting - bubbles rose from the bottom of the tumbler and a froth appeared at the top. I left this for about 4 hours at room temperature.
Important: Dont add the yeast until the water is at room temperature or you will kill it. Yeast is a living organism and cannot survive at temperatures above 30 degrees C. |
 |
|
9. When the brewing bucket juice had cooled, I squeezed the juice from the oranges and lemons and added it. Next the 2 litres of grape concentrate were added followed by 4 teaspoons of yeast nutrient and 4 teaspoons of pectic enzyme. The whole mixture was thoroughly stirred and then the yeast starter was added. I placed the lid on the bucket and left it in a warm room (15 to 20 degrees C). |
 |
|
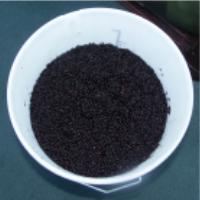
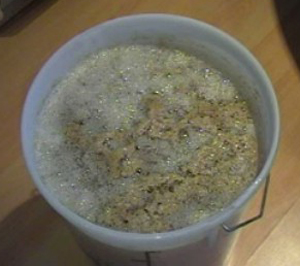
10. The yeast started converting the sugar in the grape juice and the natural sugar present in the elderberries into alcohol. This stage is called 'Primary Fermentation' or fermenting on the pulp - the pulp being the mass of elderberries.
The photograph shows the side of the brewing bucket during this stage. All the elderberries rise to the top of the juice forming a 'cap'. This must be broken up and stirred into the juice twice daily to ensure good contact with the yeast and allowing the juice to be extracted. |
 |
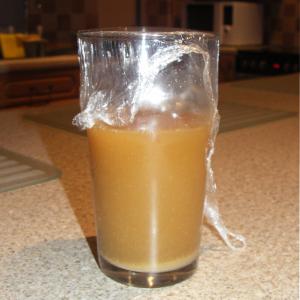
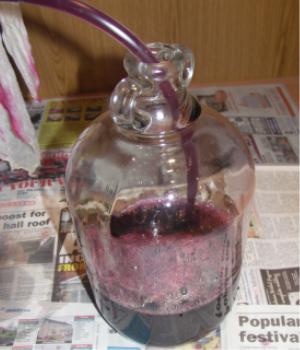
11. After 4 days the fermentation in the bucket had slowed down considerably - the berries were now sinking. It was now time to transfer fermentation to the demijohns and to add the sugar listed in the recipe.
I boiled 1 pint of water in a saucepan and then added 1kg of sugar (top photograph). I kept stirring until all the sugar had disolved then allowed it to cool before pouring through a funnel into a demijohn. I repeated this 3 times as I was making 4 gallons.
Warning: Dont pour into the demijohn while hot. I did this once, the bottom of the demijohn cracked and the bottom fell out.
The bottom photo shows the sugary water in the demijohn. |

|
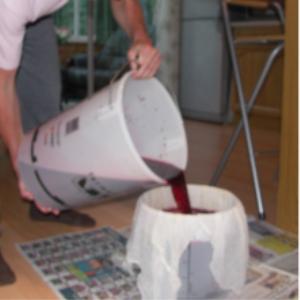
13. The next stage can be a little messy so I put plenty of old newspaper sheets on the floor.
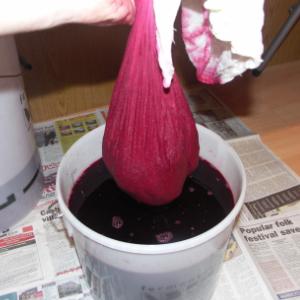
I sterilised a second bucket and a piece of muslin cloth. I draped the cloth over the bucket, pushed it right down to the bottom and draped the excess over the sides. I stirred the fermenting juice so that the yeast that had gathered at bottom of the bucket was evenly distributed throughout the liquid. Next I poured it into the second bucket - into the muslin as shown in the top photograph.
I gathered the excess cloth in my hand and pulled the cloth slowly out of the bucket (lower photograph). I let the juice flow out of the 'bag' and then squeezed it as the flow stopped. All the skins, pips and small stalks from the berries remained inside the cloth which I emptied out into my compost bin.
The cloth was washed and was re-used for other brews.
|
|
14. I siphoned the juice from the bucket into the 4 demijohns that contained the disolved sugar.
Warning: Only fill the demijohn as high as the shoulder. Once the yeast starts converting the sugar a lot of gas will be produced and if you fill too high then the juice will bubble out through your airlock.
Tip: When siphoning, put your tube right down to the bottom of your demijohn. This stops splashing and bubbling i.e. mixing air into your juice. Air and bacteria are the enemy during this second stage of fermentation - bacteria uses oxygen to convert the alcohol to vinegar. |
 |
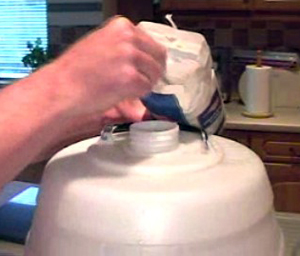
15. I fitted the airlock and half filled the bubble chambers with sterilising fluid (see step 5). I placed the demijohn in a warm place with a steady temperature of between 18 and 24 degrees C aand covered it with a black bin liner to block out the daylight.
All I then had to do was to sit back and wait for a few weeks while the yeast converted the sugar into alcohol. For this wine, the fermentation lasted about 7 weeks but some wines will finish bubbling after 2 to 4 weeks.
This stage is called the secondary fermentation or anaerobic fermentation as it takes place in the absence of air.
|
 |
16. When fermentation had stopped, I checked the sugar content with my hydrometer (see how to use a hydrometer for details). I wanted to end up with a dry wine
I crushed a couple of Campden Tablets and put them into a freshly sterilised demijohn. I siphoned off the wine - this is called racking - into the demijohn, trying not to suck up any of the yeast that was in a layer at the bottom. I fitted a rubber bung and left the wine in a cool dark place.
I repeated the racking process every couple of months until the wine was clear. At this point the wine was ready for bottling. |
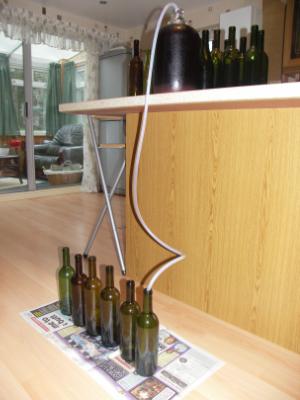
17. Clean and sterilise your bottles and your siphon tube. Take your demijohn from its place of storeage, being careful not to disturb any sediment that may have collected in the bottom, and place high above the bottles.
Siphon off the wine into your bottles. Dont fill too much else you wont get the cork in. On the other hand dont leave too much air in else the wine could go off. Look at a bought bottle of wine for a guideline.
You should get six 750ml bottles from a 1 gallon demijohn. |
 |
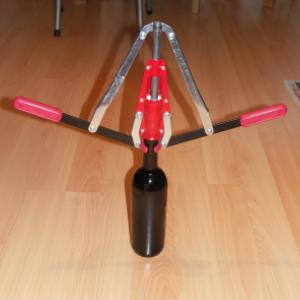
18. Insert the corks. Use only new corks as used corks could introduce bacteria into your wine and spoil it.
The photo shows a corker. The cork is placed in the red barrel just above the neck of the bottle. This barrel is tapered so that as the cork is pushed down it is squeezed until it is narrower than the bottle neck. Once the cork is in place it springs back into shape forming a tight seal.
When the two handles are pressed down two things happen. The two red grips push in, tightly gripping the neck of the bottle. The rod at the top is pulled down, pushing on the cork and forcing it into the bottle neck. |
 |
19. The end!
6 bottles of great tasting, low cost wine to be enjoyed at your leisure! |
 |

